

Boss JD Hogg
-
Posts
1,211 -
Joined
-
Last visited
-
Days Won
33
Content Type
Profiles
Forums
Gallery
Episodes
Events
Posts posted by Boss JD Hogg
-
-
Happy Birthday Boss Hogg(Sorrell)!
Thanks Roger and Hobie! It's an honor to share a birthday with Sorrell Booke.
-
Happy Belated birthday Rick(Cletus)!
-
Happy New Year!
-
Not too much excitement in the last 24 hours. I was working on building a model of a Visitor Laser Jeep from the 1984 TV series 'V'. I had picked up 3 Monogram 1/24 scale Jeep kits. 2 are being built as the Jeeps from 'V' and one will be Daisy's Jeep.
I watched a couple of episodes of MASH this evening with my wife. MASH is another favorite TV show of mine.
-
Merry Christmas everybody! My wife and I are staying home with the cats and my dad is coming over!
-
2 hours ago, Roth Potter said:
Very cool! Also smart with the antenna. always have problems with flimsy antennas.
Thanks Roth! One of the reasons I used the magnet for attaching the antenna is if I need to pack the model to move. An antenna will be the first part to break off.
-
2 hours ago, HossC said:
Great job (again). I don't think I've ever seen color comparisons done with models.
Thanks Hoss! I really enjoy building the General Lee. Now I just need to build a Boars Nest!
")
-
Thanks again Roger!
"Dukes Meet Cale Yarborough" is one of my favorite episodes. I remember back when I first saw it I thought the white Charger was so cool and then the 3 General Lees at the end was even better.
The 2 different colors are like seeing a picture from Dukesfest. There were always different orange GL's there.
I'm going to stick with the Corvette Flame Red color for the next General Lee's I build. I'm planning on building LEE 1 and LEE 3 from "One Armed Bandits" using Revell '69 Charger kits. I also have a 1/16 General Lee kit I'll be building soon and a Ghost Of The General Lee kit. I can never have enough General Lees.
-
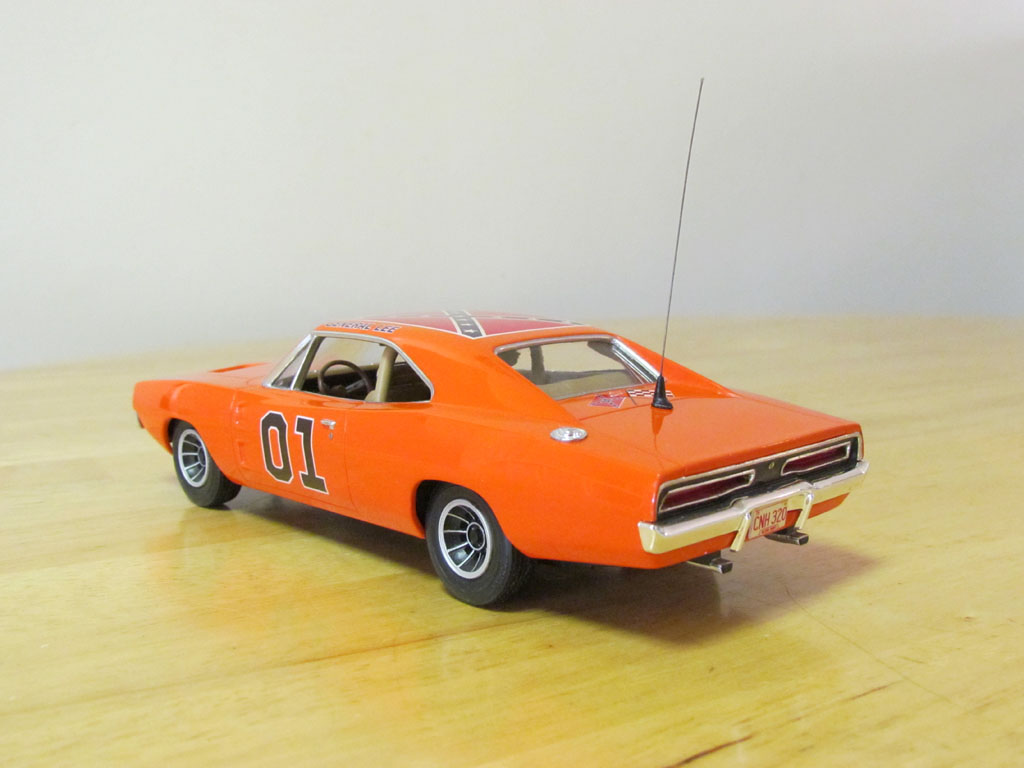
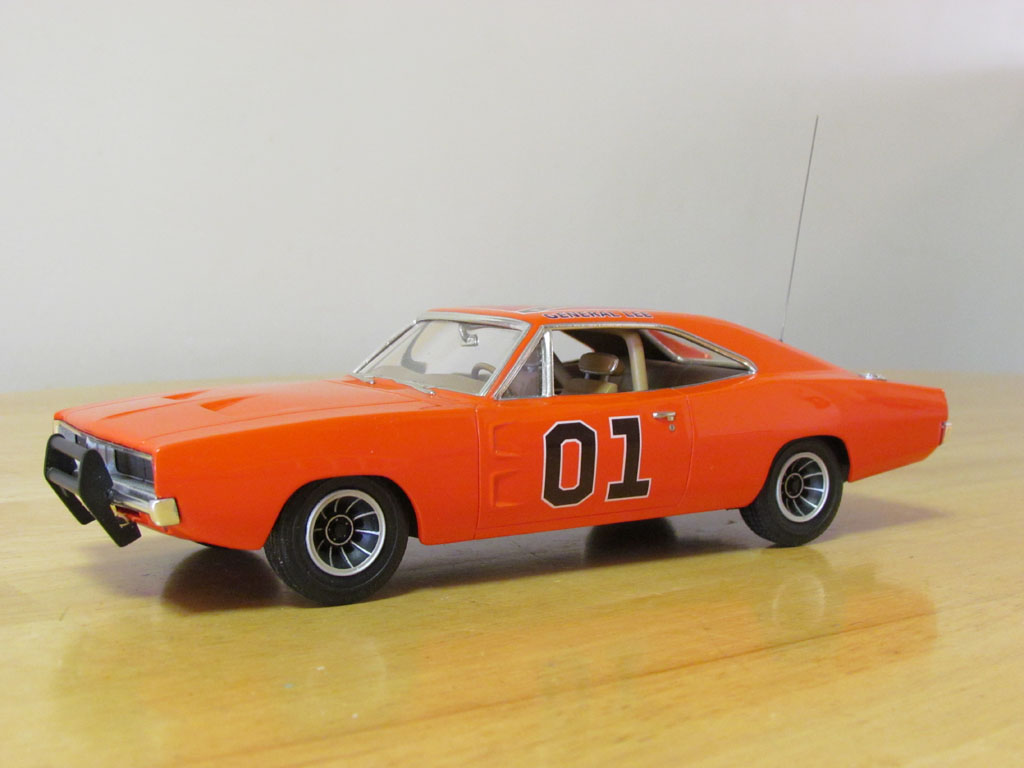
Here are some pictures I took with both General Lees I built. The lighter orange GL is this one I just finished and the darker orange GL is the one I built last year.
This new one is painted 1975 Corvette Flame Red which was the main color used on the beauty cars on the show. The last one I built is Chevrolet Hugger Orange which is a darker, more red, looking orange.
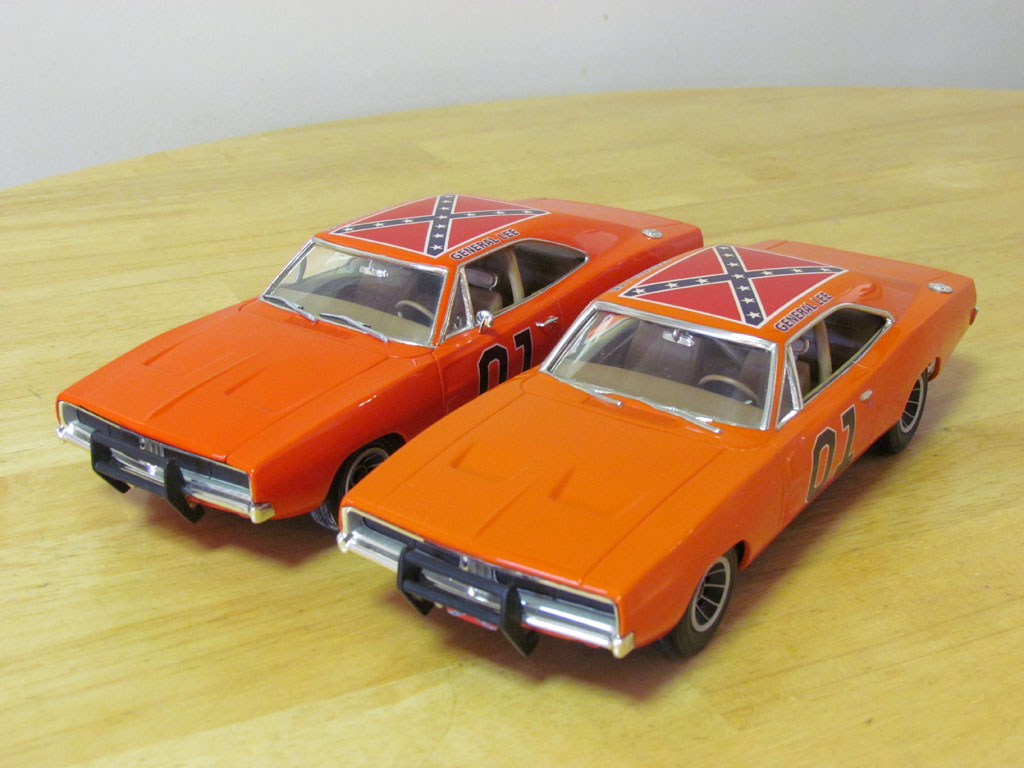 IMG_9098 Small by Michael Scarola, on Flickr
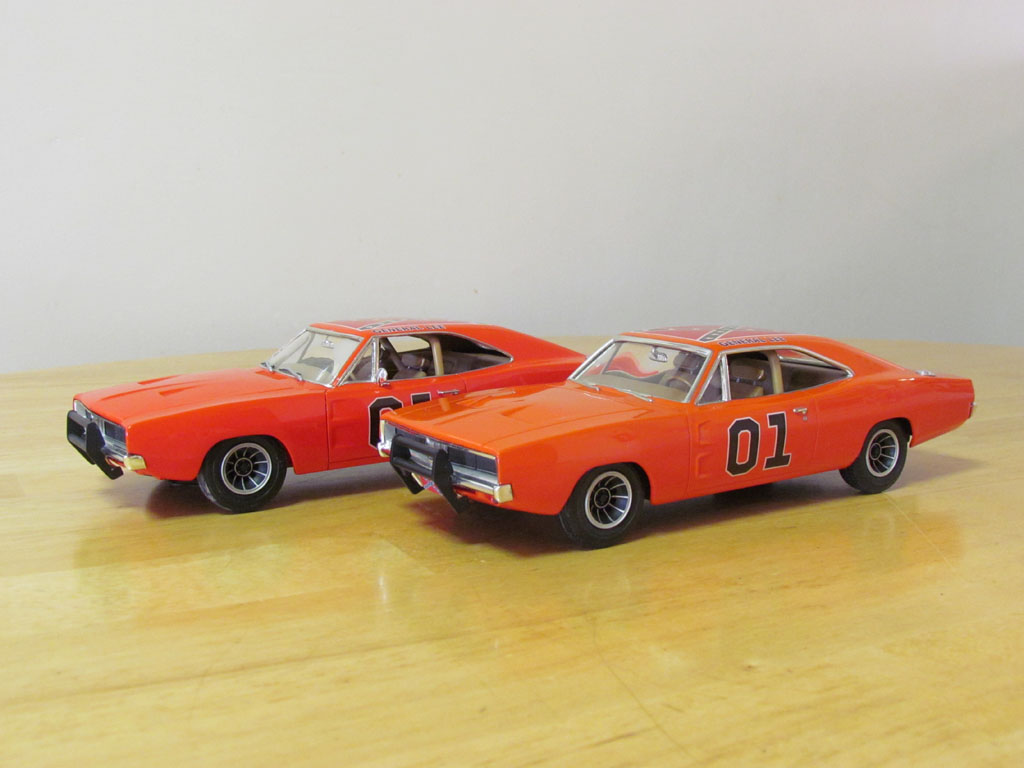 IMG_9100 Small by Michael Scarola, on Flickr
 IMG_9105 Small by Michael Scarola, on Flickr
-
Thanks Roger!
The antenna is removable using magnets. I installed a magnet under the trunk.
-
I finished the General Lee. Here are some pictures.
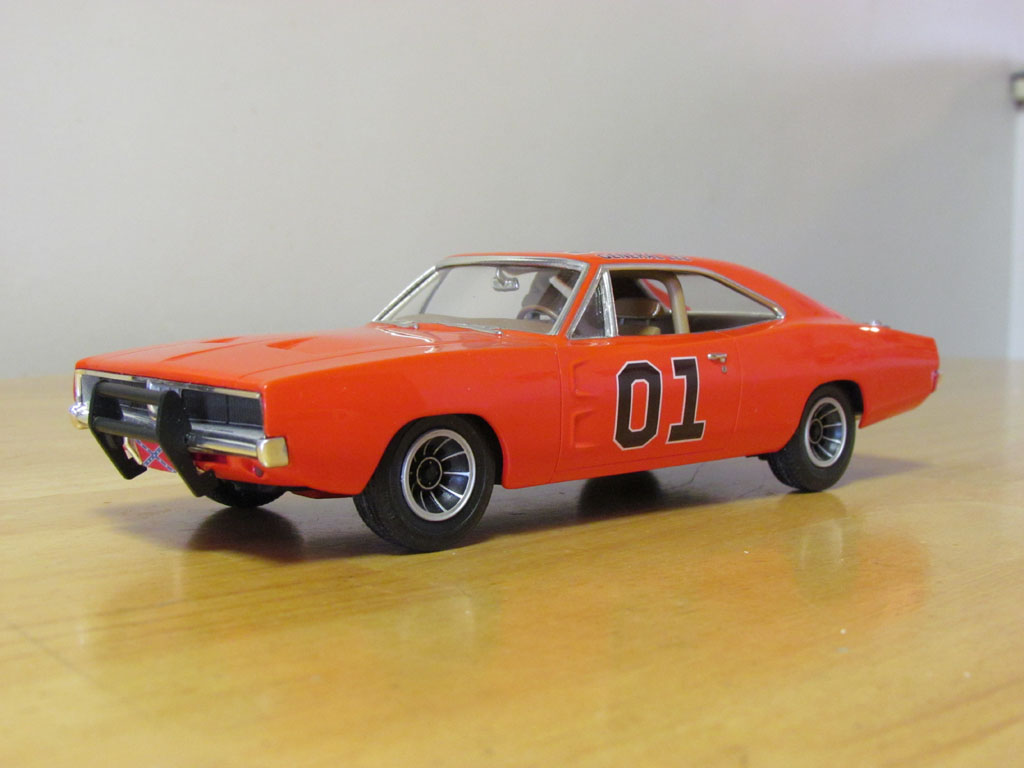 IMG_9080 Small by Michael Scarola, on Flickr
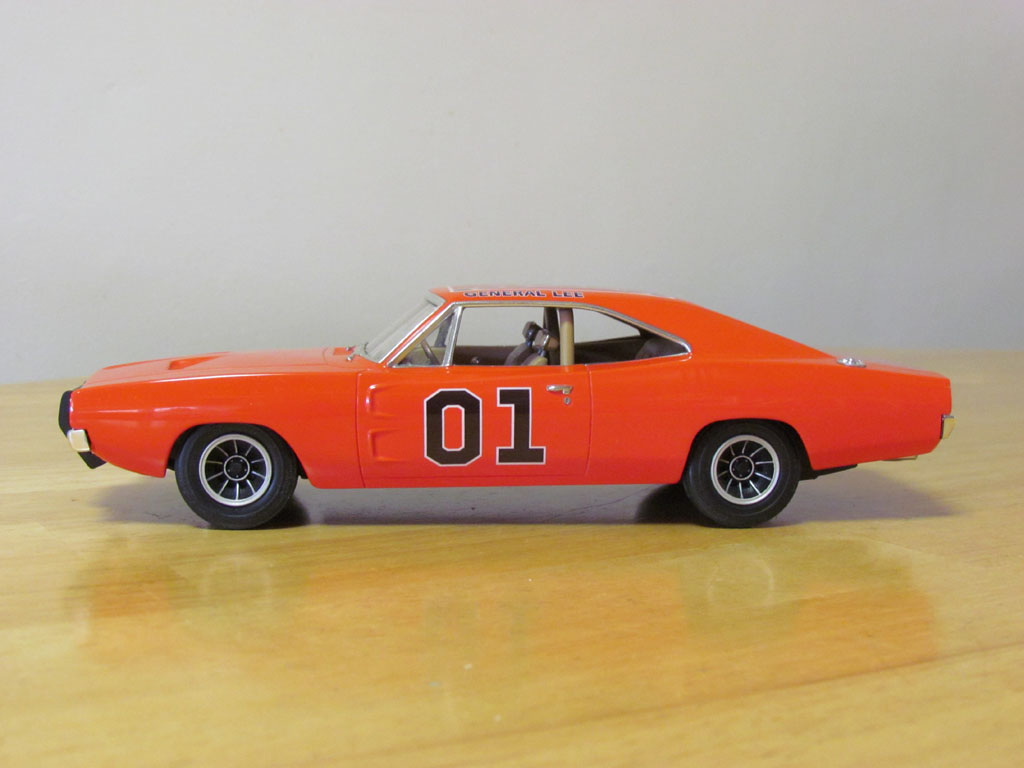 IMG_9082 Small by Michael Scarola, on Flickr
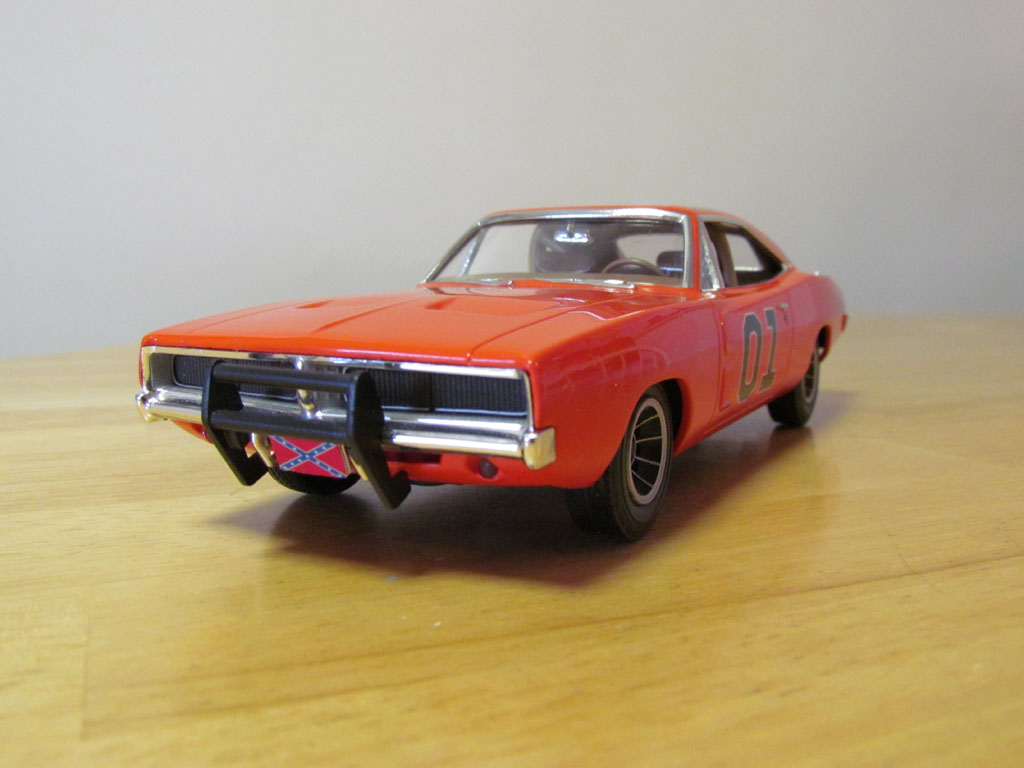 IMG_9068 Small by Michael Scarola, on Flickr
 IMG_9084 Small by Michael Scarola, on Flickr
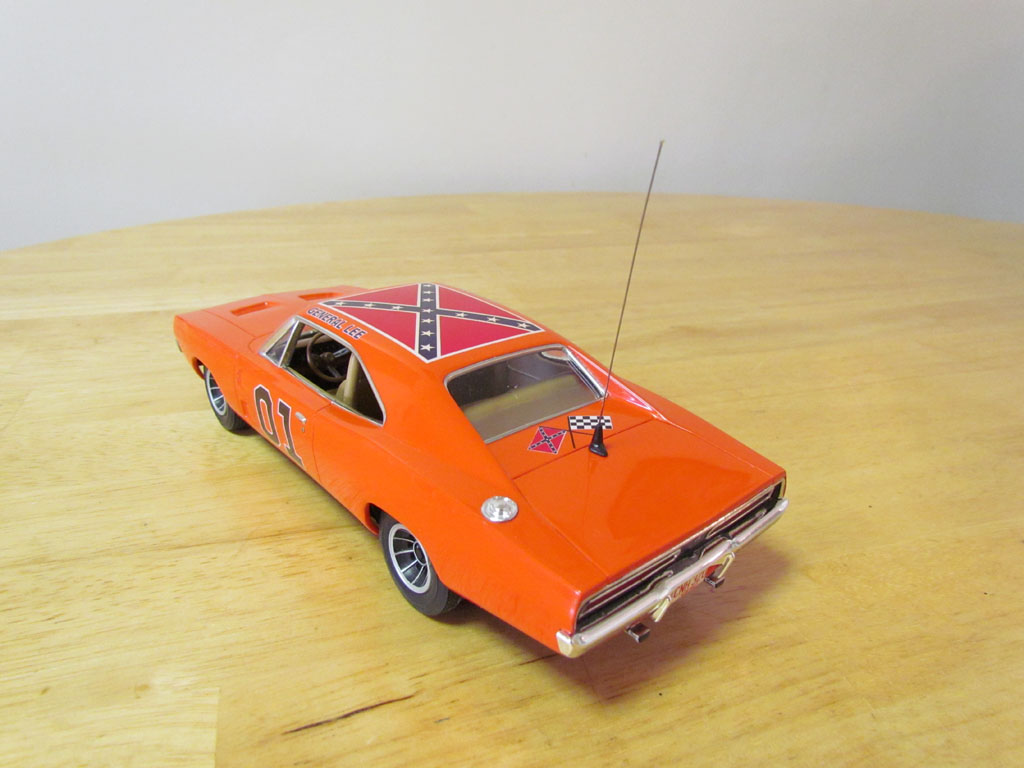 IMG_9089 Small by Michael Scarola, on Flickr
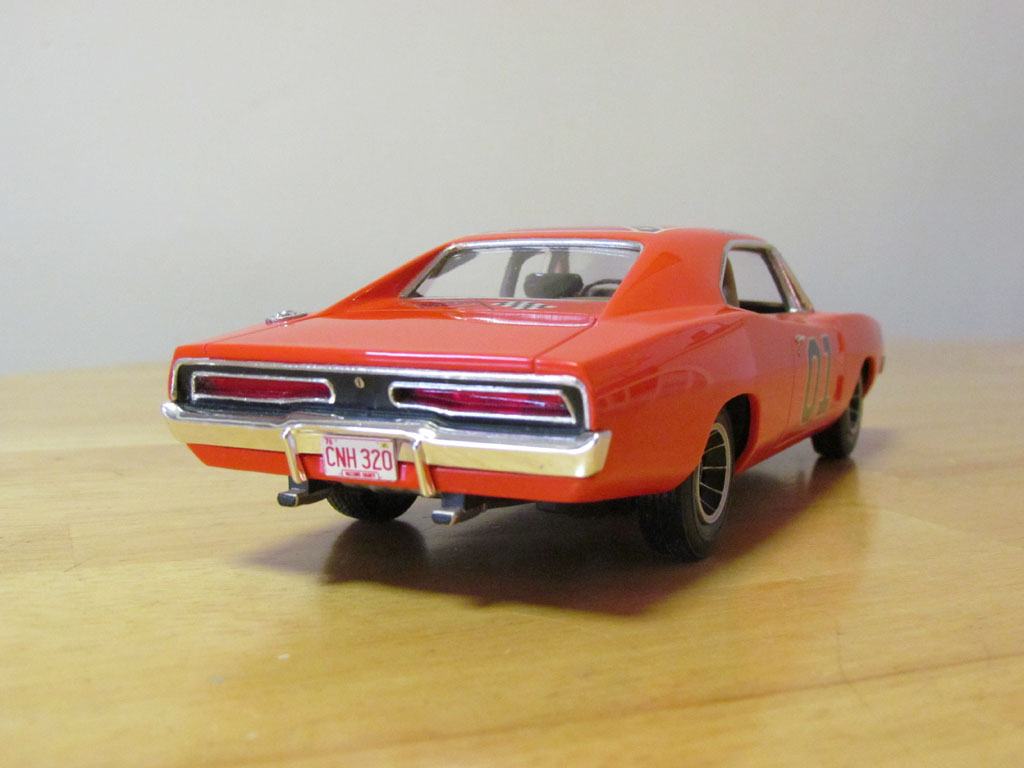 IMG_9072 Small by Michael Scarola, on Flickr
 IMG_9073 Small by Michael Scarola, on Flickr
 IMG_9077 Small by Michael Scarola, on Flickr
 IMG_9078 Small by Michael Scarola, on Flickr
 IMG_9090 Small by Michael Scarola, on Flickr
 IMG_9093 Small by Michael Scarola, on Flickr
 IMG_9095 Small by Michael Scarola, on Flickr
-
23 hours ago, HossC said:
The West Country accent may work well in Lord of the Rings, but here's a behind-the-scenes clip from the original Star Wars. It would have been a very different movie if they'd used Dave Prowse's own voice.
It's so different hearing David Prowe's voice coming from Darth Vader. It's just not as scary. LOL
-
Thanks Roger and Roth!
")
-
From what I heard when MPC originally released the 1/25 General Lee they couldn't find the correct 1969 hood and interior bucket. It was released with a 1970 hood and a stock car interior bucket.
When MPC released the Charger 500 kit they found the correct 1969 hood. The 1969 hood tooling was misplaced again so the General Lee kept the 1970 hood.
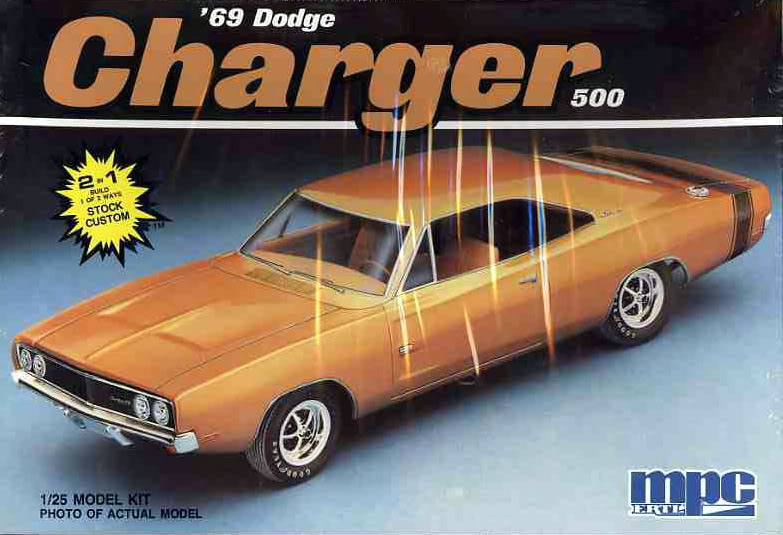 1969Charger500 by Michael Scarola, on Flickr
When I built my MPC glue kit General Lee I located a 1969 hood from a Charger 500.
Here's my MPC glue kit General Lee I built last year with the 1969 hood and correct interior.
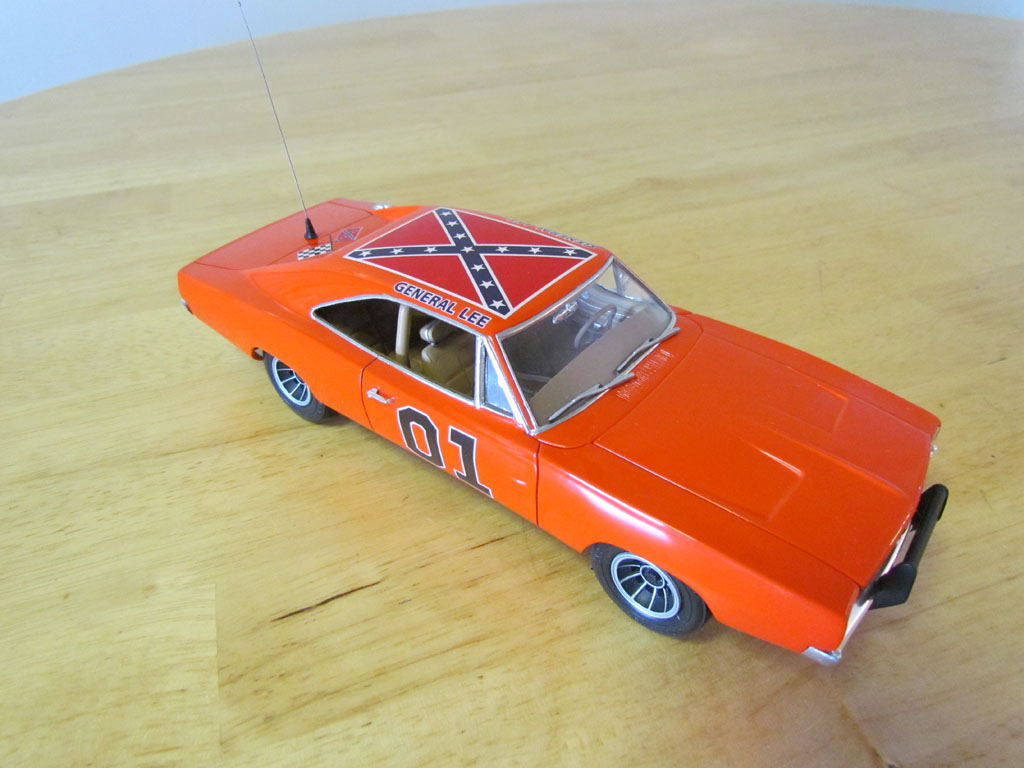 IMG_7579 Small by Michael Scarola, on Flickr
-
6 hours ago, Roth Potter said:
As always, great job on that model!
I didn't know there was a difference on the hood between those years. What is different?
Here's a picture showing the MPC General Lee's(1970) hood on the right side in white plastic and an MPC 1969 Charger hood in yellow plastic.
In 1968 and 1969 the 2 scoops in the hood were smaller. In 1970 the 2 scoops were wider and differently shaped.
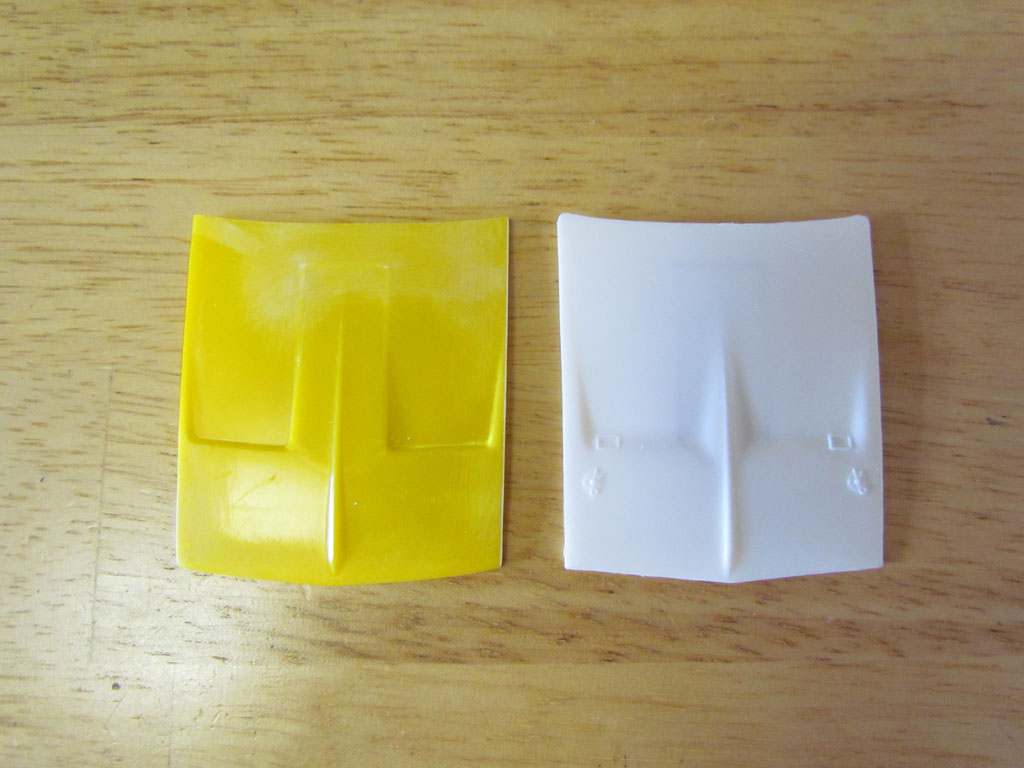 IMG_6094 Small by Michael Scarola, on Flickr
-
On November 21, 2017 at 11:45 PM, RogerDuke said:
And we enjoy your posts and your friendship!
Hey Thanks! I enjoy talking with everyone here on this great forum.
-
Phil, I use flickr.com and it's free to use.
-
The shorter push bar was used up till the beginning of season 4 even though it's usually referred to as the Georgia push bar.
-
On November 6, 2017 at 11:51 PM, Hobie Harkins said:
Your cars are awesome! You really are good at making the General look good!
Thanks, I really appreciate the nice words! I really love the General and enjoy putting in the time.
-
Thanks Roger and Hoss for the kind words!
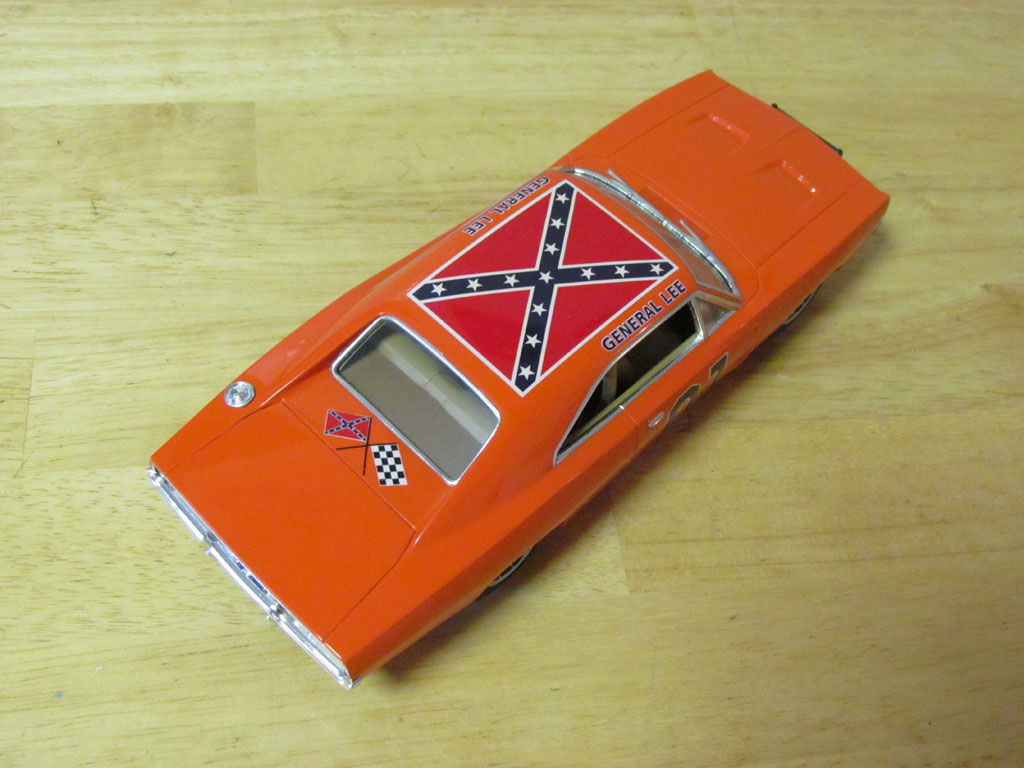
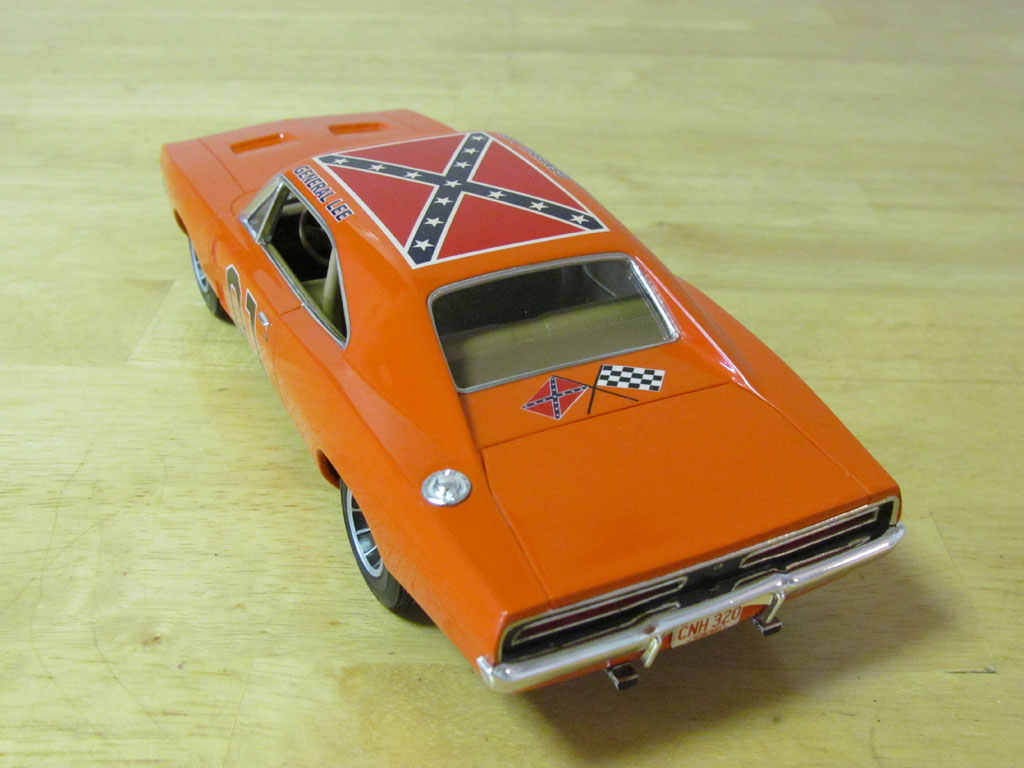
I read somewhere that they removed the 2 smaller flags to save time since they weren't seen all the time. The early Georgia episode Generals are my favorite look for the car so I like to include them on my builds.
I'm not as crazy about how the General Lee had the light beige interior and the wider/flatter push bar in the later seasons so I tend to stick with the earlier look.
This snap kit is a new tooled kit from MPC but it's largely based on the original General Lee glue kit. It does have a correct 1969 hood. The original glue kit has a 1970 hood. I added the same details to the interior that I added when I build the glue kit last year and scratch built the push bar too. The General Lee parts(push bar, roll bar, CB radio, decals...) that come in the kit aren't too accurate so I made them and used decals a friend had made for me.
I didn't use the Vector wheels that came in this kit either. I'm not sure why they didn't include the same wheels from the glue kit, which are far more accurate. This kit's wheels are flatter then they should be. I used a set of Vectors from an AMT 1969 Riviera kit that look more accurate.
I have to put the foil on the moldings and install the windows and I can put it all together.
Thanks again for looking in and the nice comments!
-
Here's another update!
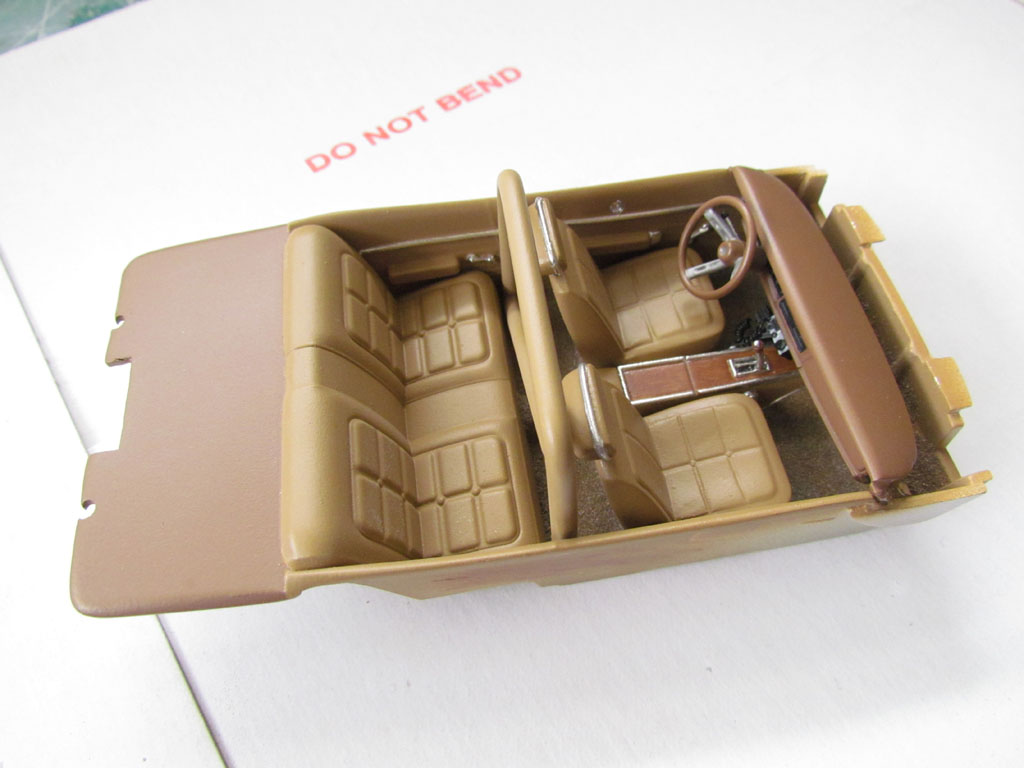
I painted the interior and used embossing powder for the carpeting. The interior is painted Tamiya XF-59 Desert Yellow. The dashboard and speaker tray are painted Testors Acryl Leather with a few drops of white added. The center console is painted to look like wood although it doesn't show too well in the pictures. I painted Testors Acryl Leather over Testors Flat White with some Radone Tan added. I used BMF(Bare Metal Foil) on the door handles and trim.
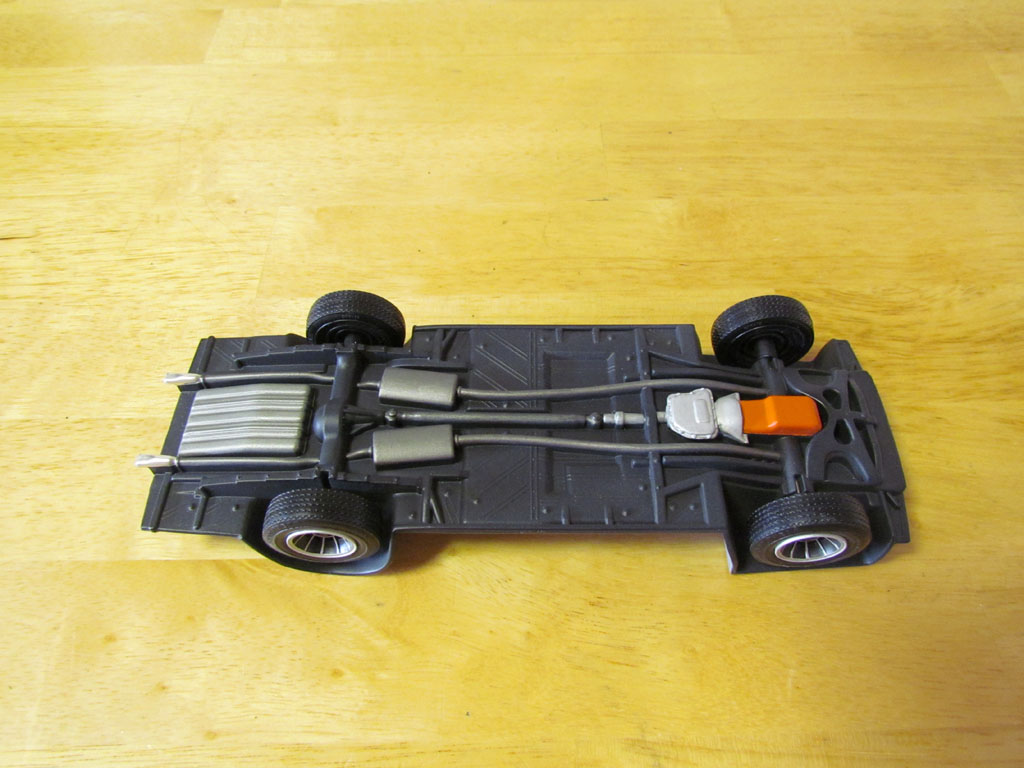
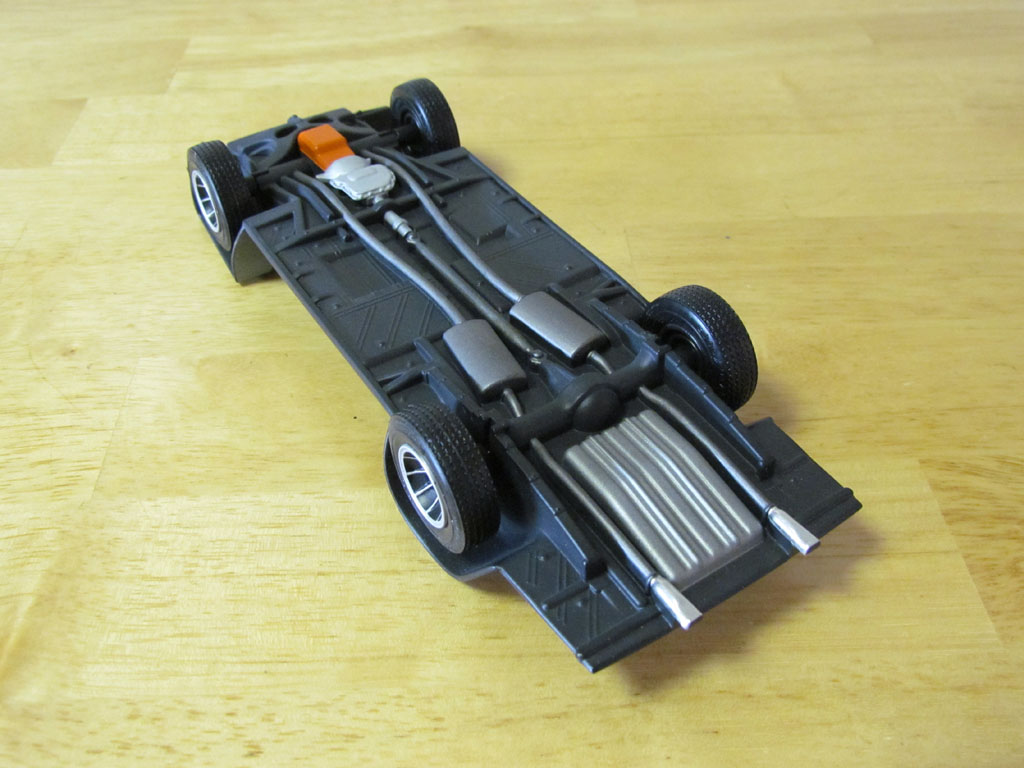
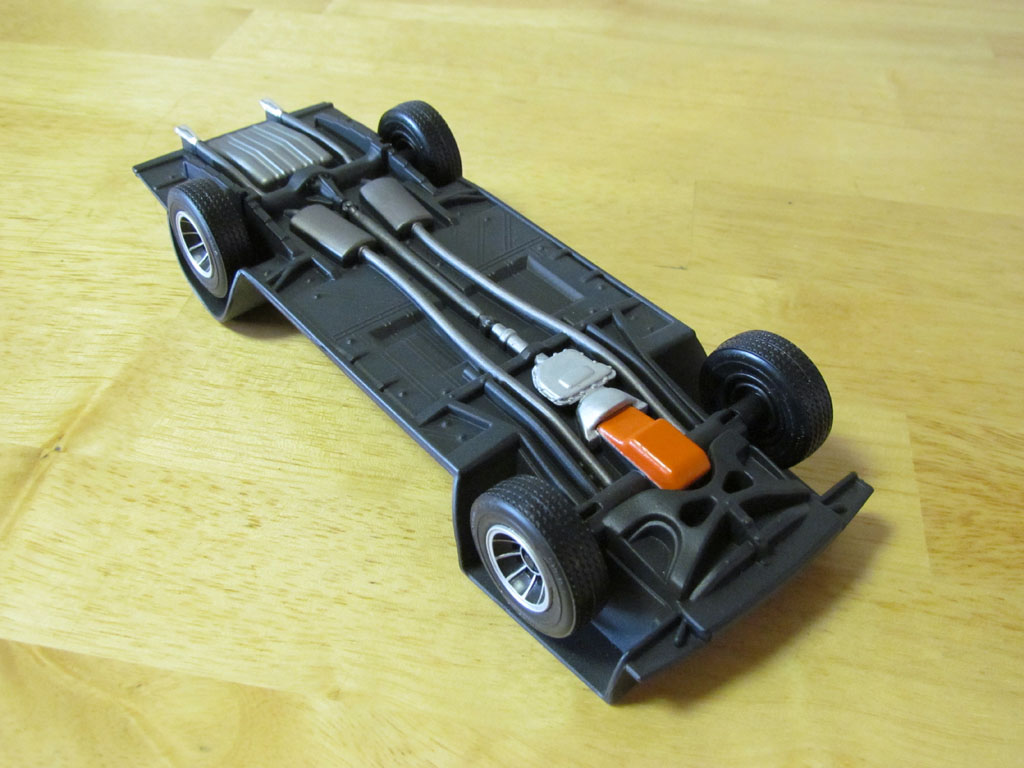
The chassis is done. Since it's a snap kit with molded in exhaust and drivetrain, I just painted it Testors Acryl Aircraft Interior Black. The Exhaust and drive shaft are brush painted with Citadel Leadbelcher. The engine oil pan is brush painted Testors International Orange and the transmission is Tamiya XF-16 Flat Aluminum. The gas tank was airbrushed with Tamiya XF-56 Metallic Grey.
The body was clear coated with Gunze Mr. Super Clear and polished.
I have to apply BMF to the moldings and install the windows.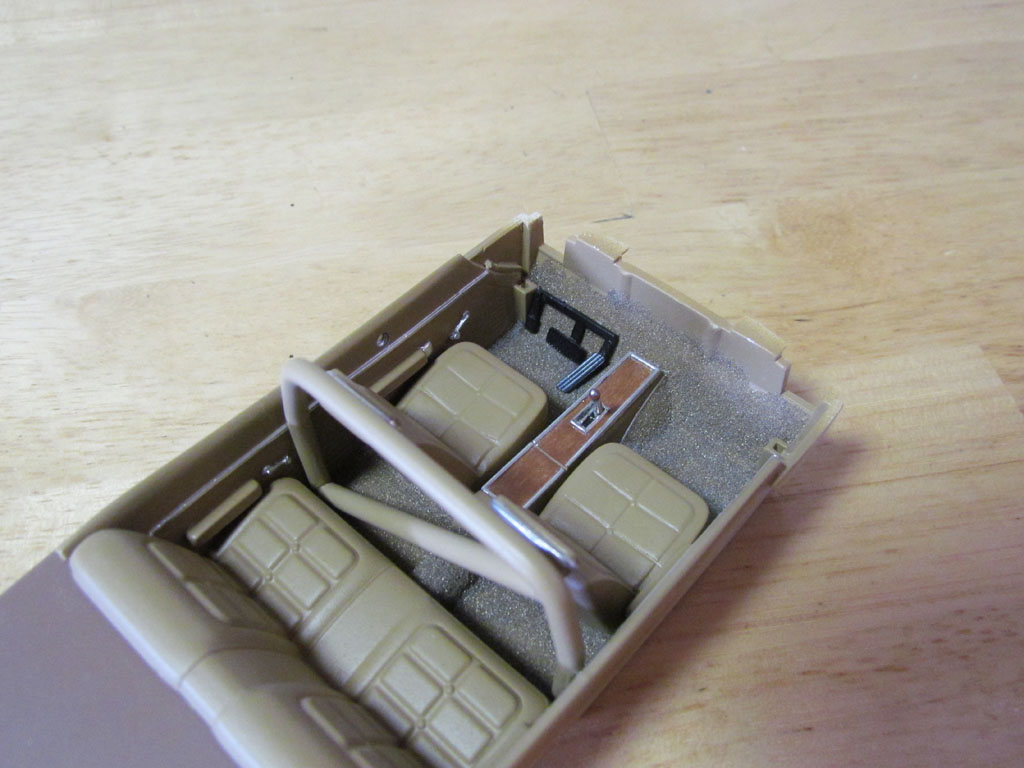 IMG_8799 Small by Michael Scarola, on Flickr
 IMG_8805 Small by Michael Scarola, on Flickr
 IMG_8808 Small by Michael Scarola, on Flickr
 IMG_8810 Small by Michael Scarola, on Flickr
 IMG_8815 Small by Michael Scarola, on Flickr
 IMG_8816 Small by Michael Scarola, on Flickr
 IMG_8821 Small by Michael Scarola, on Flickr
 IMG_8822 Small by Michael Scarola, on Flickr
 IMG_8824 Small by Michael Scarola, on Flickr
 IMG_8825 Small by Michael Scarola, on Flickr
 IMG_8828 Small by Michael Scarola, on Flickr
-
Thanks Roger! I'll post more updates soon.
-
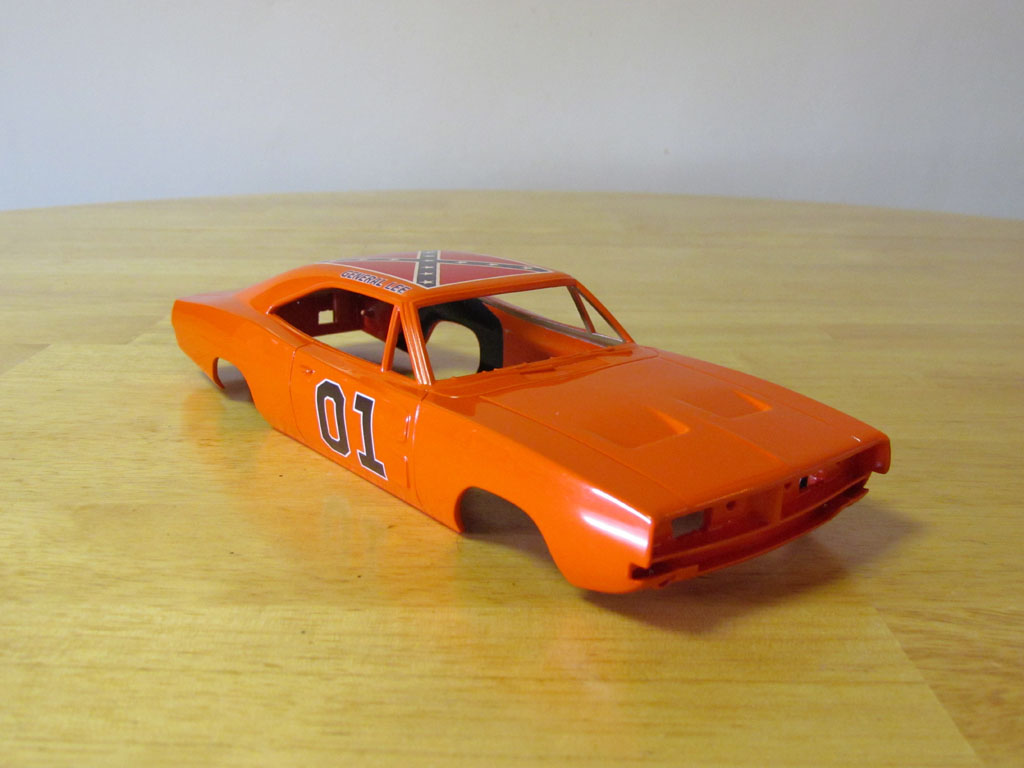
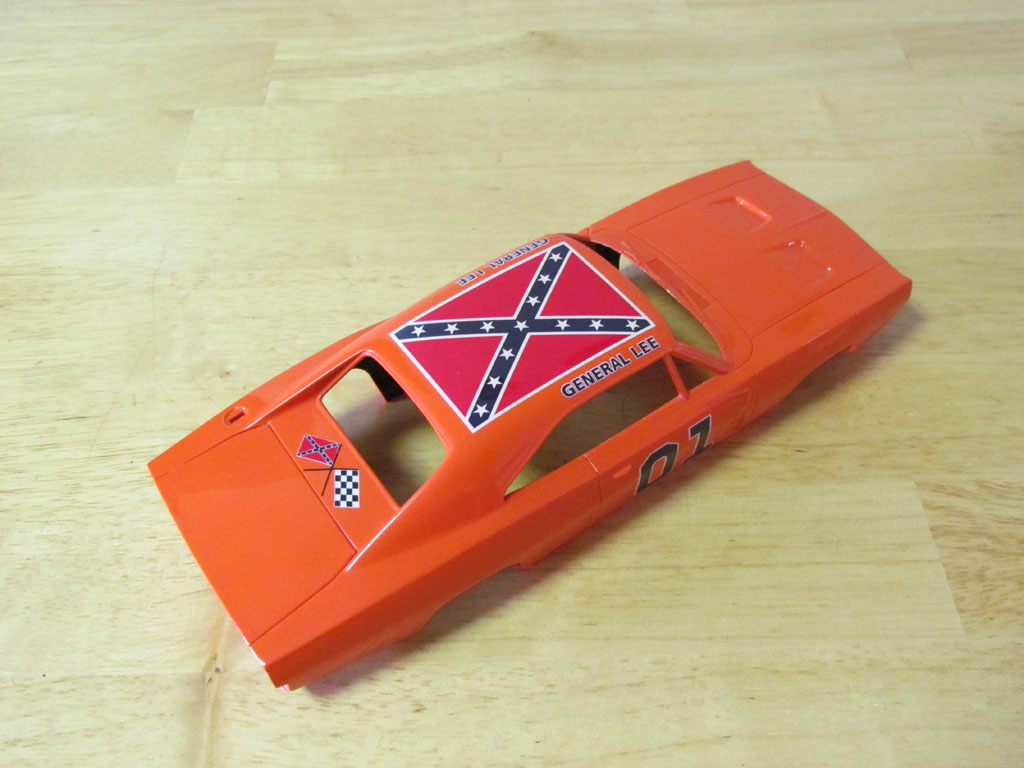
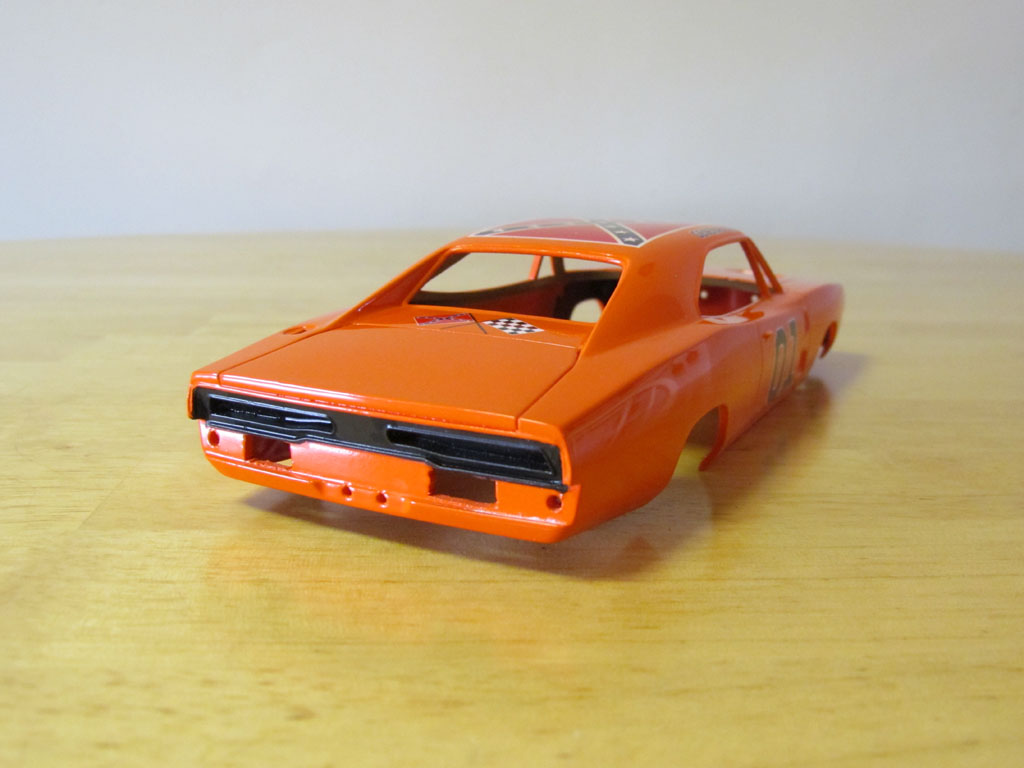
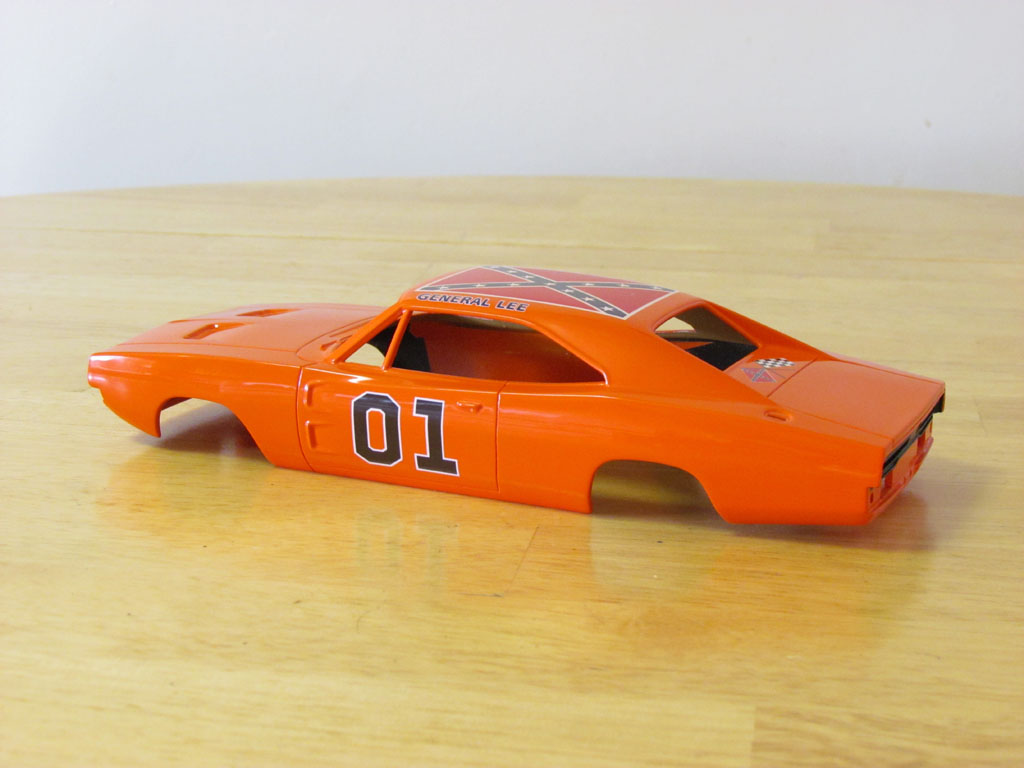
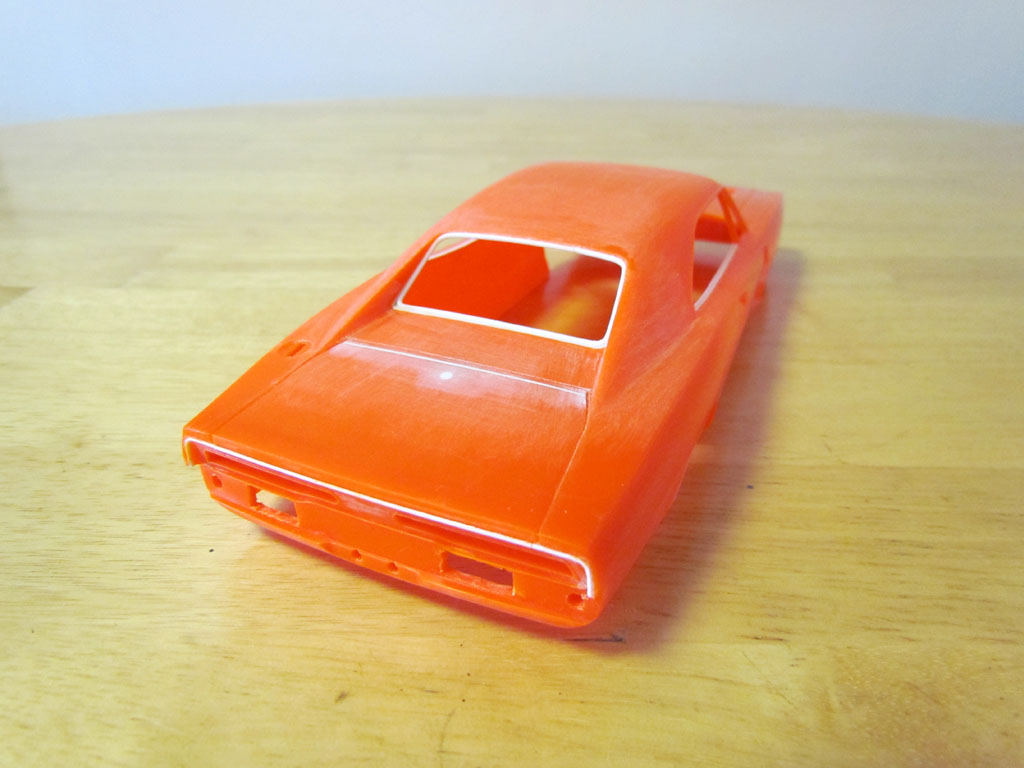
I started working on another General Lee model. This is the 1/25 scale MPC Snap Kit General Lee.
I started by re-shaping the rear window. It's basically a rectangle in the kit so I made it a bit larger and rounded at the top and also changed the angle to be a bit more steep. I added missing window trim under the side windows and made the rear wheel openings slightly smaller in the rear.
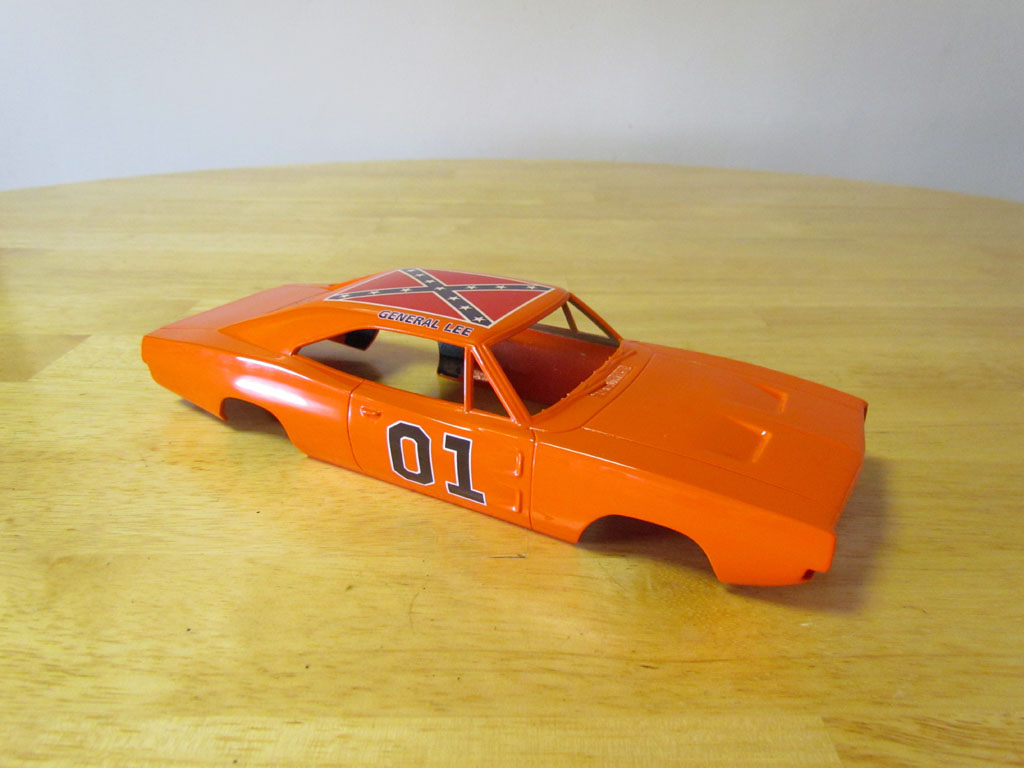
The body is painted 1975 Corvette Flame Red which was the color most used on the General Lee(s) in the TV show. The paint is from Gravity Colors. The decals represent the early Georgia car which is my favorite look. In a few days I'll spray the clear coat on the body.
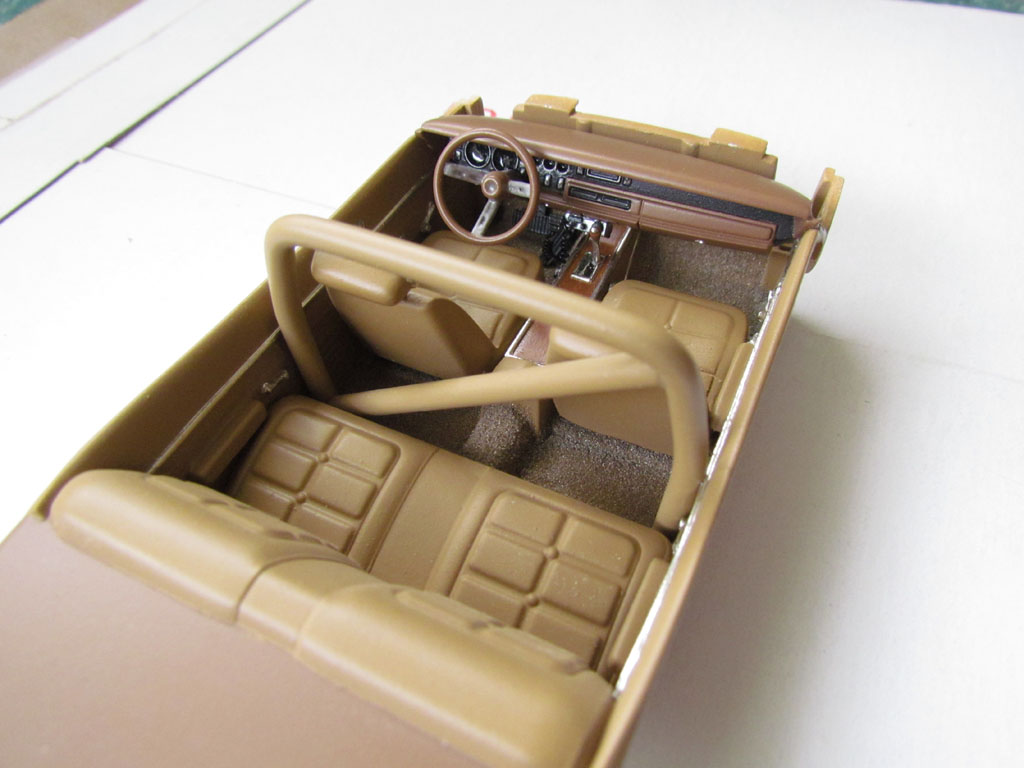
I worked on the interior a bit. I scratch built arm rests, pedals, window rollers, center console, head rests automatic shifter and a roll bar. This kit comes with a stick shift but the General Lee was always shown on screen with an automatic. I also modified the transmission on the chassis to resemble a 727 Torqueflite automatic.
The interior had an armrest molded into the center console which I removed. I also added a strip of molding along the upper part of the door panels.
Much like the MPC glue kit General Lee, the dashboard sat too low and level. I raised it up and angled it a bit. The interior tub sat to low and too far forward when it was attached to the inside of the body. I removed the mounting tabs and filed down the sides so it fits up to the top of the doors and moved back a bit. I had to then move the dashboard forward.
The grill inserts in the kit are for a later year Charger, much like the MPC glue kit. I scratch built new grill inserts using some ribbed styrene sheet. The push bar is scratch built to resemble the early style push bar.
I'll get the parts in primer and start painting them.
Thanks for looking in!
 IMG_8605 Small by Michael Scarola, on Flickr
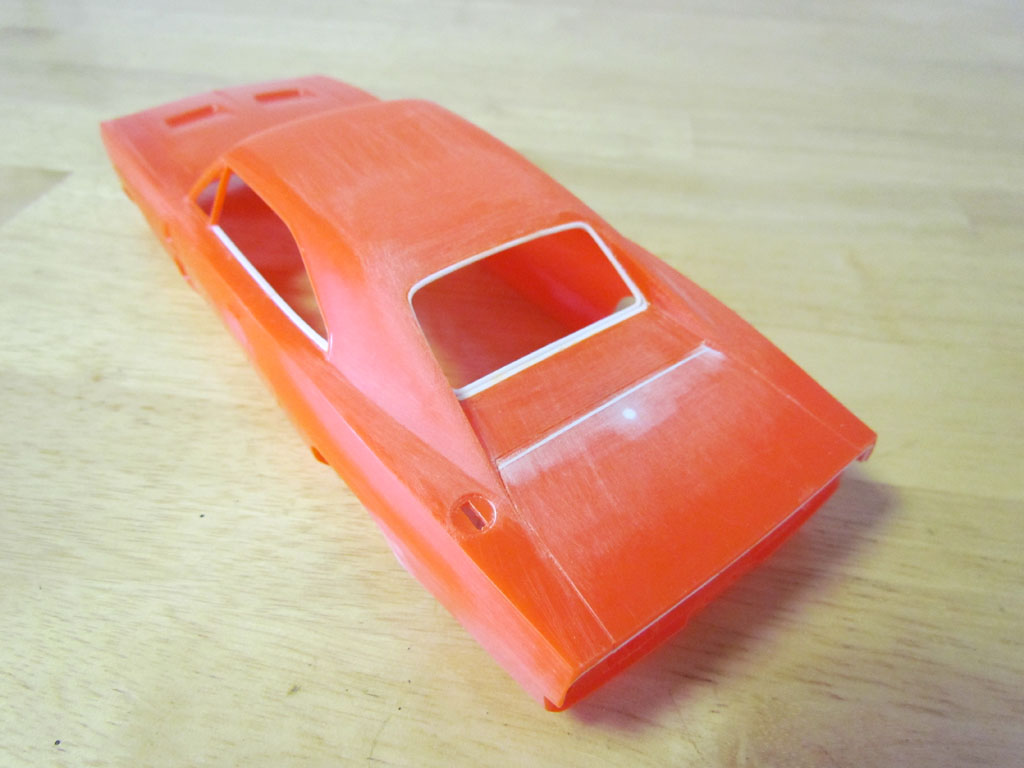 IMG_8606 Small by Michael Scarola, on Flickr
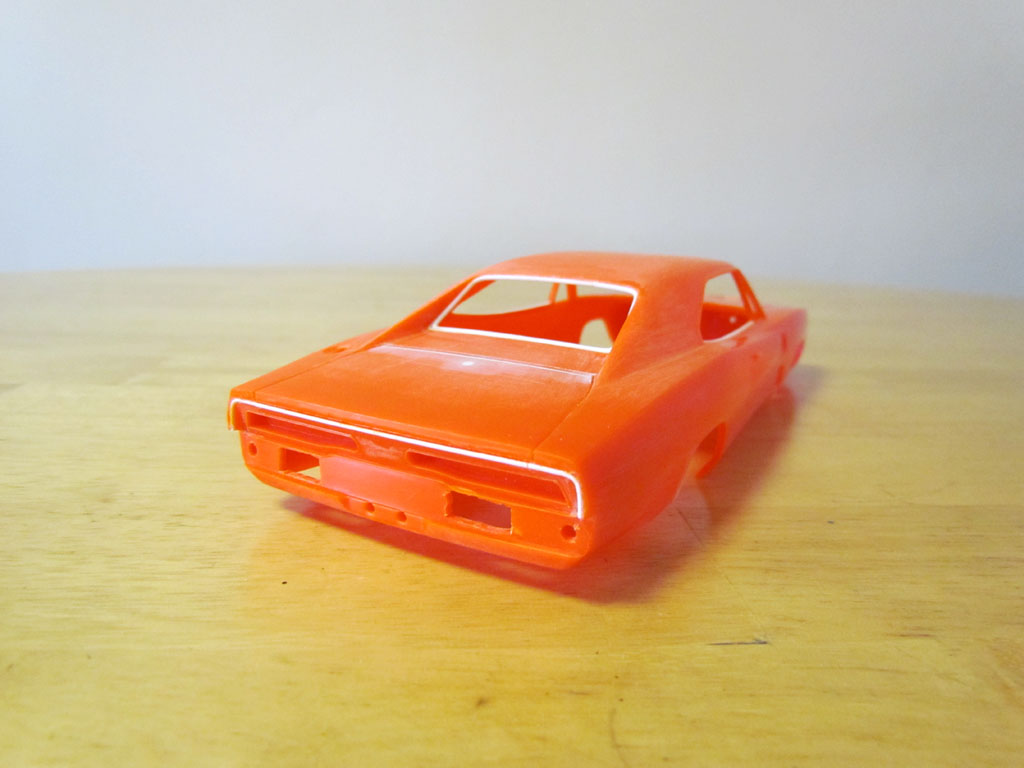 IMG_8609 Small by Michael Scarola, on Flickr
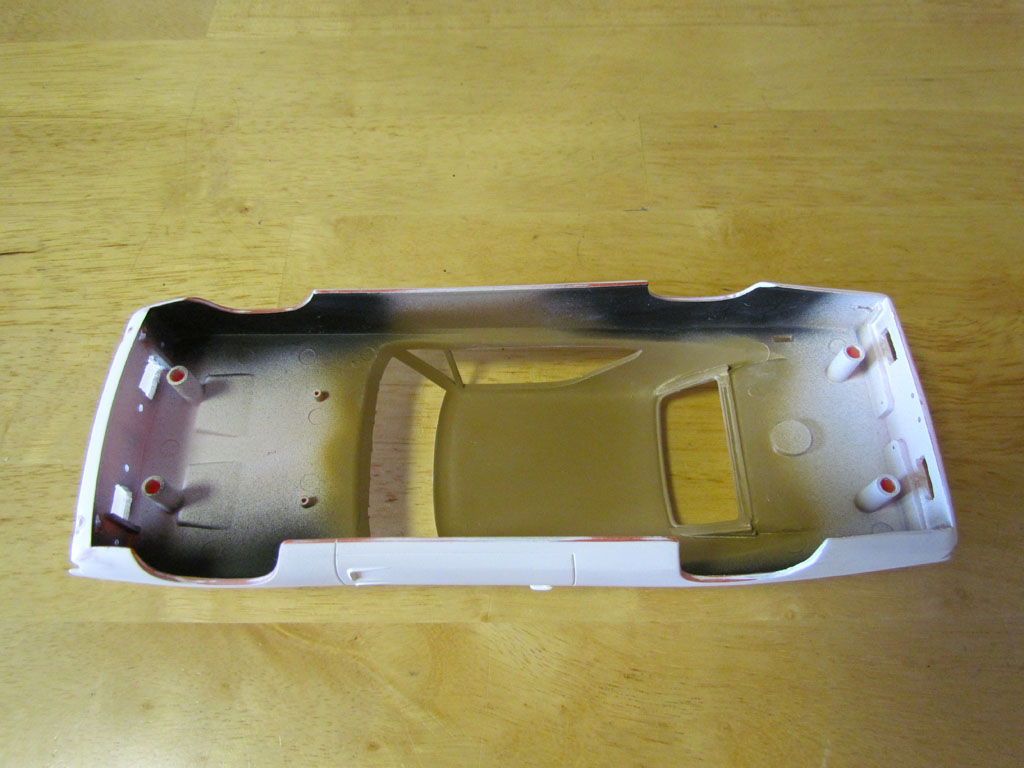 IMG_8633 Small by Michael Scarola, on Flickr
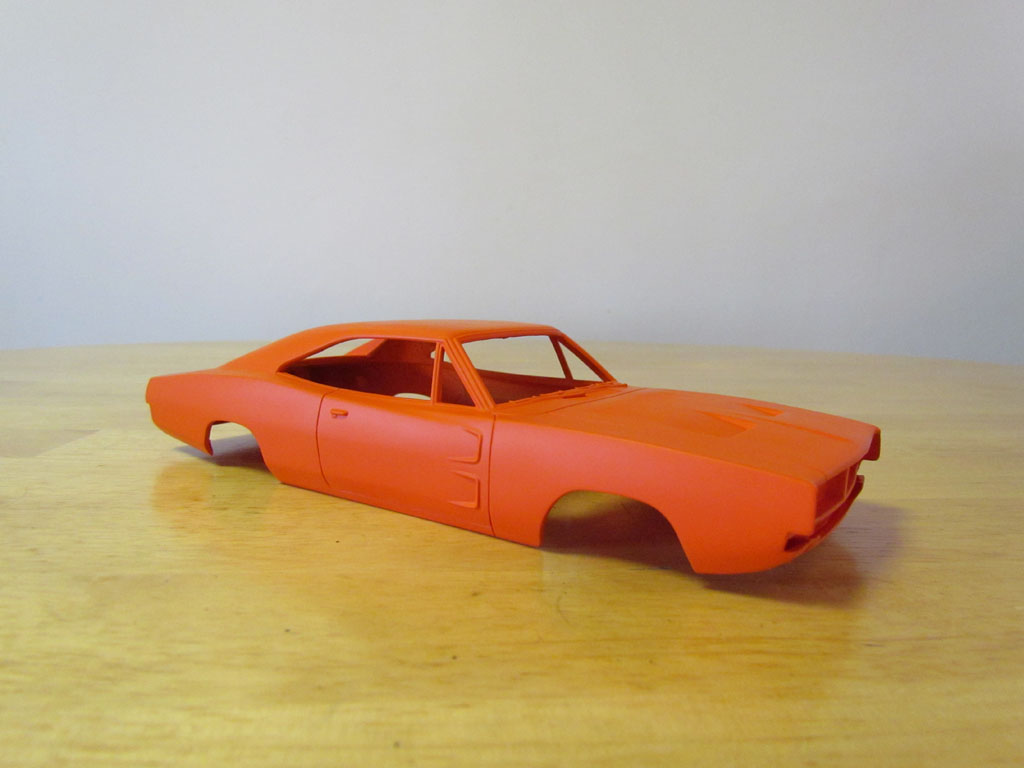 IMG_8660 Small by Michael Scarola, on Flickr
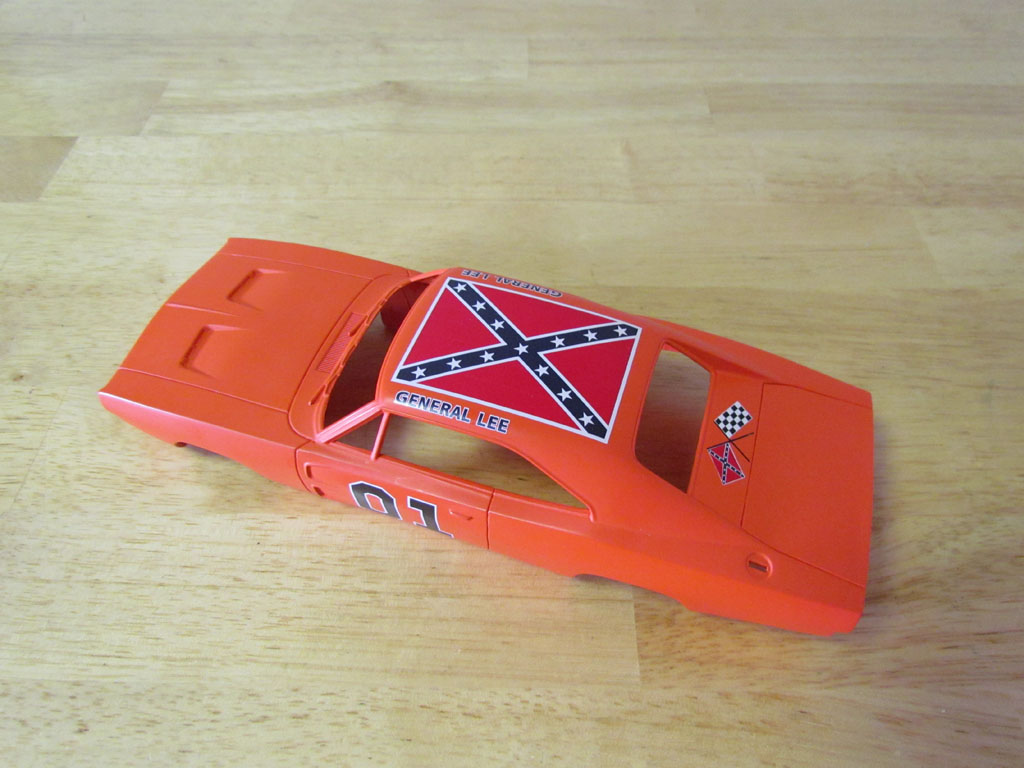 IMG_8678 Small by Michael Scarola, on Flick
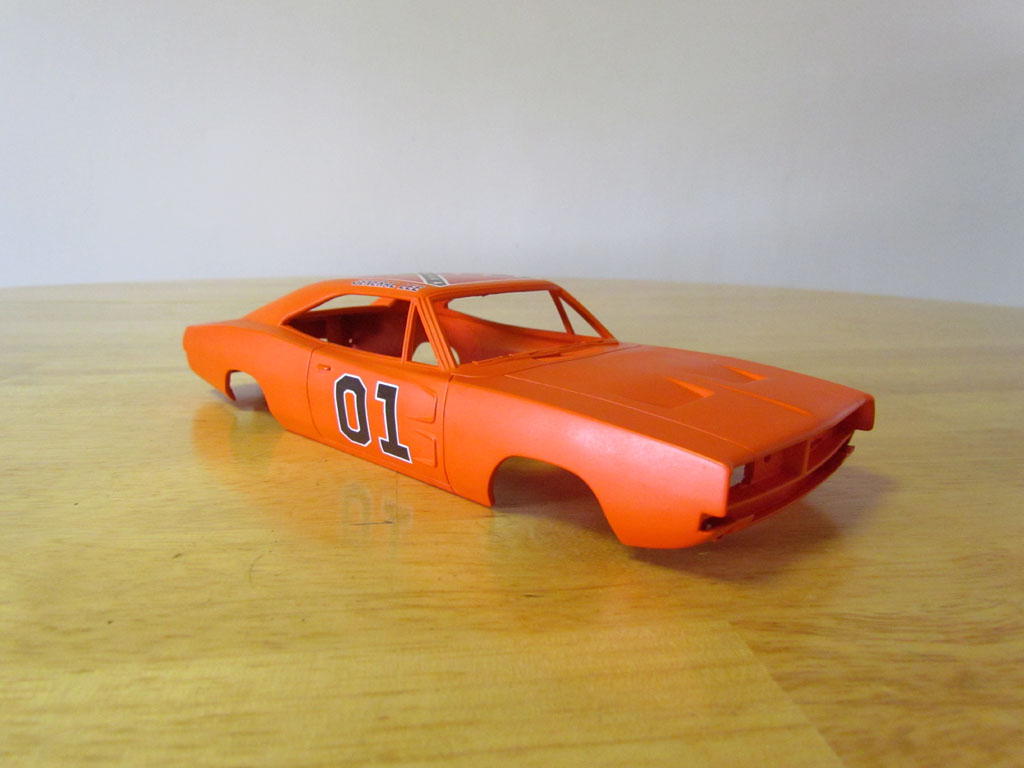 IMG_8683 Small by Michael Scarola, on Flickr
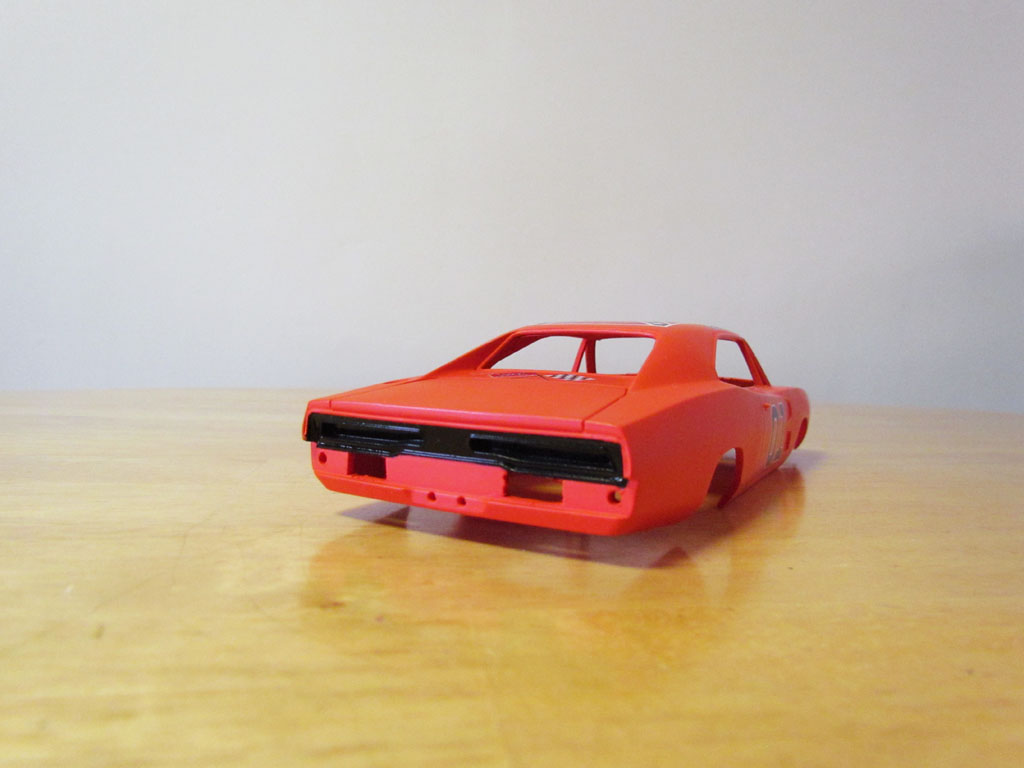 IMG_8692 B 30 C 10 Small by Michael Scarola, on Flickr
 IMG_8694 Small by Michael Scarola, on Flickr
 IMG_8696 Small by Michael Scarola, on Flickr
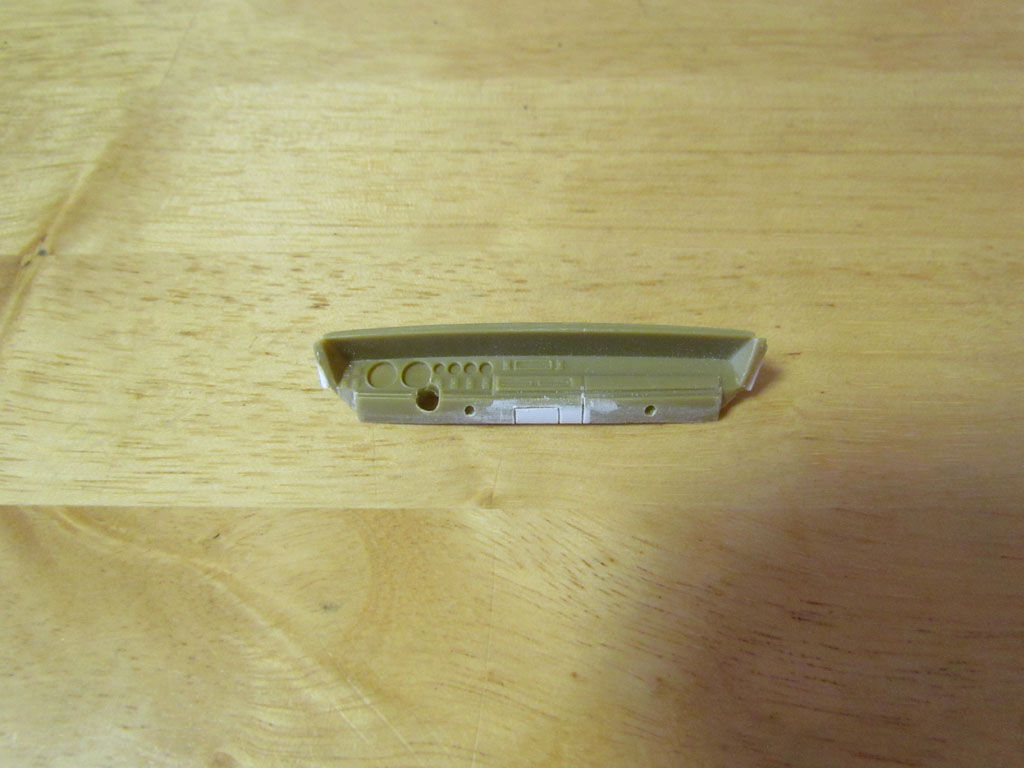 IMG_8699 Small by Michael Scarola, on Flickr
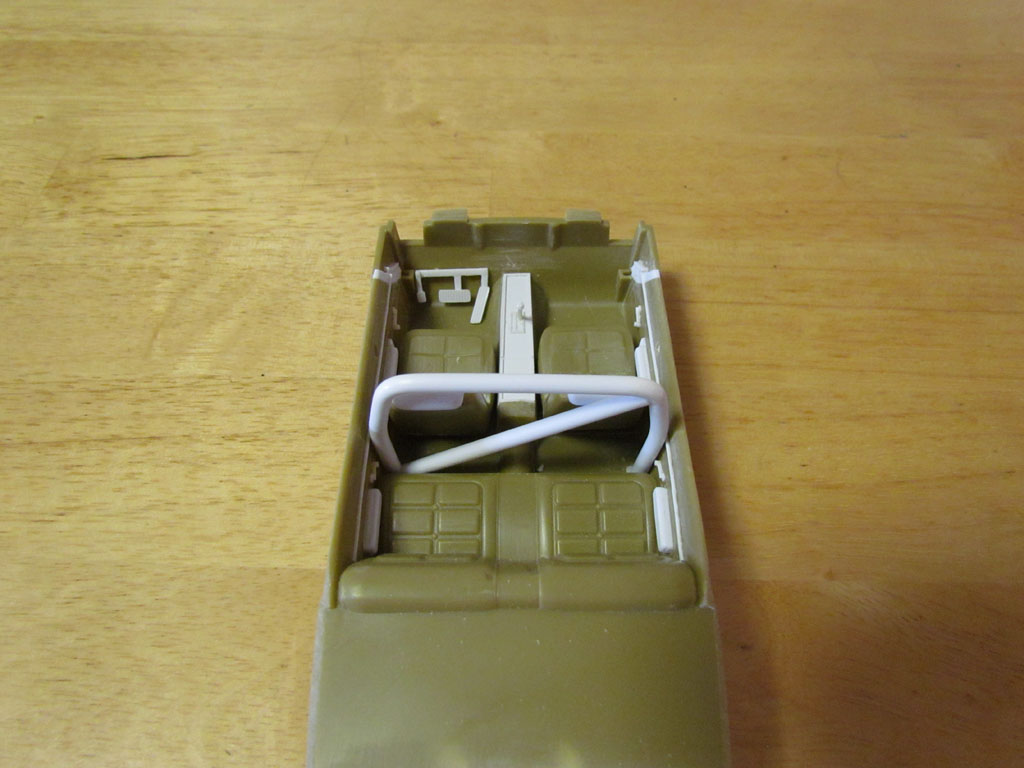 IMG_8701 Small by Michael Scarola, on Flickr
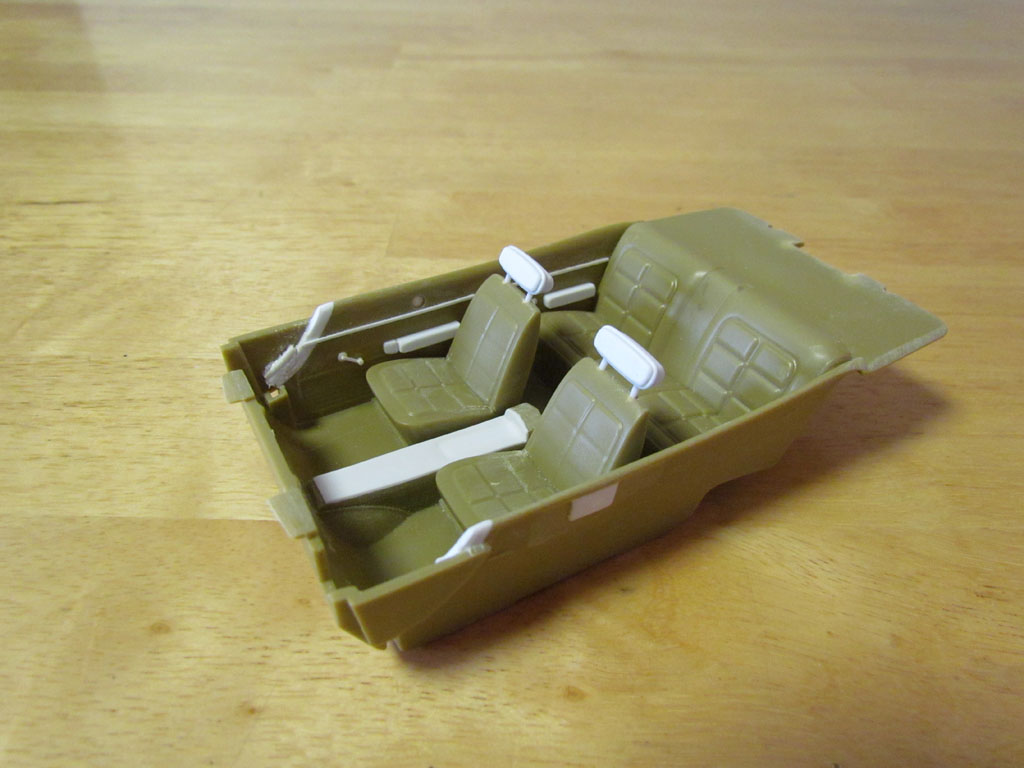 IMG_8711 Small by Michael Scarola, on Flickr
 IMG_8712 Small by Michael Scarola, on Flickr
 IMG_8717 Small by Michael Scarola, on Flickr
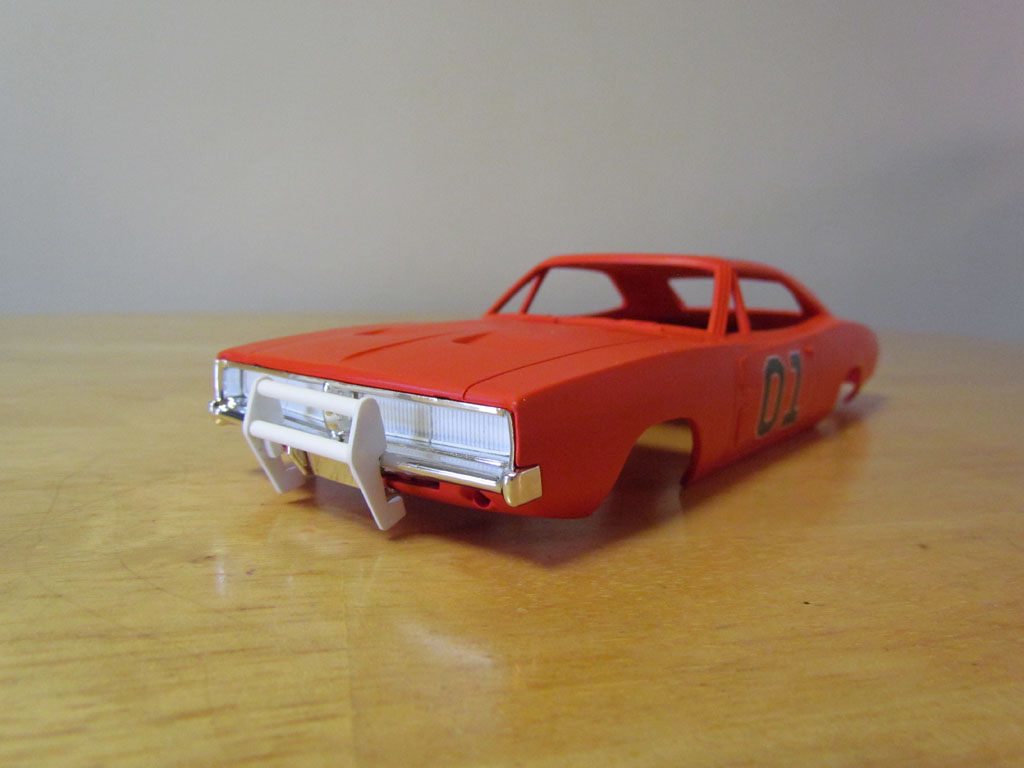 IMG_8723 Small by Michael Scarola, on Flickr
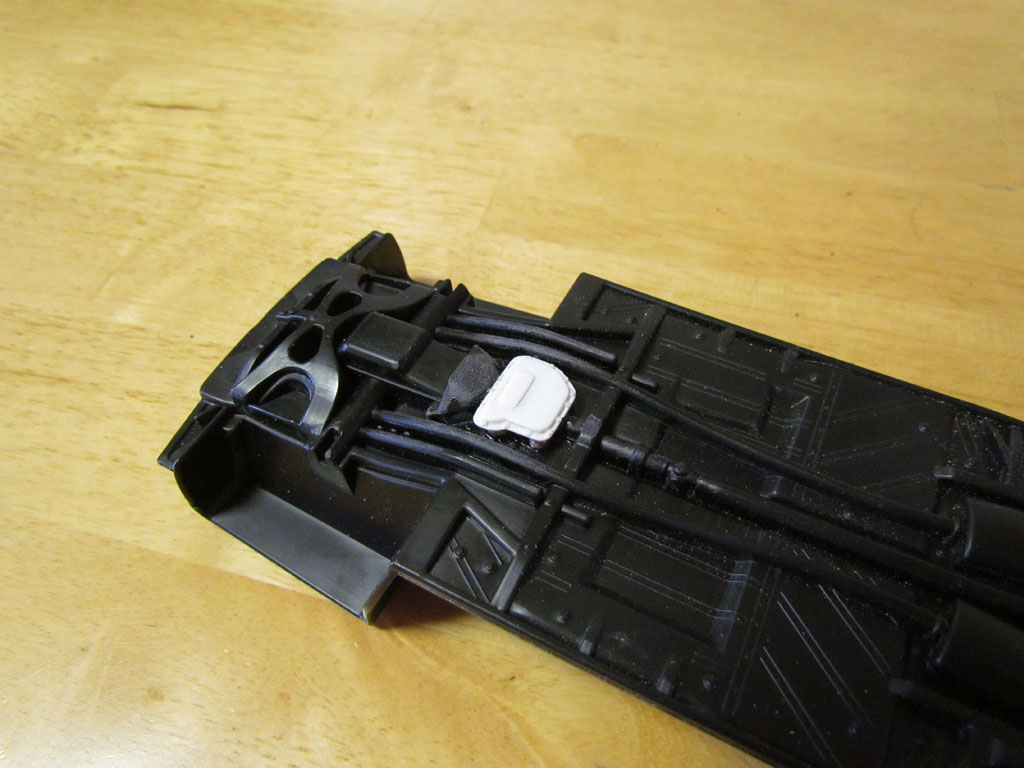 IMG_8735 Small by Michael Scarola, on Flickr
-
Happy Birthday Sheriff Little(Don Pedro Colley)!

The last 24 hours
in Hazzard Swamp
Posted
A lot of running around today!