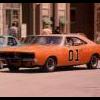
CDoherty95 Posted February 10, 2013 Report Share Posted February 10, 2013 I'm at it again guys! I know I haven't been online much recently, I'm sorry I just haven't had the time. I have however, managed to get 3 free bikes. One was abandoned at my school and given to me by the principal, one was given to me by my neighbour and the third was found next to a dumpster near my house.I'm sure some of you are wondering what happened to my Xtreme Lee project. I got it finished A couple of weeks ago, and forgot to hook up the brake cables on the first test ride. Let's just say bent forks and a bend in the frame are too damaged for even me to repair. I stripped the bike, and in a move mirroring the car builders of the series, cut off all the decals and crushed the rest of the bike.Now onto the third free bike... I had intended to use it as a parts bike, but with the demise of Xtreme Lee and the surplus of parts I decided to build an off road General Lee, similar to the Fall Guy Bike I built this time last year. I only started this project today, so I've only managed to mount the extended rear end. I plan on leaving the front as it is. The lifted rear end gives an extra inch of ground clearance to the pedals, so hopefully this will cut down on the amount of pedals I go through.Here's a behind the scenes picture of the Off Road General Lee seen in Dukes of Hazzard, and then here's two of the current progress. Quote Link to comment Share on other sites More sharing options...
CDoherty95 Posted February 27, 2013 Author Report Share Posted February 27, 2013 Sorry I haven't around much guys, but school is really taking up a lot of my time. I can't wait until when summer comes and it's all a memory!I took a break from studying this afternoon, and managed to give the General his final coat of orange. I thought one big post instead of several little posts would be better, and I haven't really had the time (I get in from school at 9.30 and just collapse into bed).Anyway here's a pic of the General after primer on the main frame with his white base coat.Next came the primer and white on the rest of the frame, but I forgot to take any photos. After the red, blue and black dried I painted the whole frame minus the cross bar (I didn't have any masking tape or time to tape off the flag and General Lee text).I designed and built this simple bike stand in woodwork class one day, and used it to support the extended rear end while painting them.And today, I had just enough time to buy masking tape and tape off the flag and General Lee text. I painted two coats of orange over the entire frame. It's the same exact colour as Lee # 2, so they'll look identical to the casual eye as I also copied the graphics off Lee # 2, and plan on covering the saddle and handlebar grips in the same chestnut leather as used on Lee # 2.For now, I'll leave you with this most up to date picture. I won't have a chance to do any more work until the 7th of march when my exams finish. Quote Link to comment Share on other sites More sharing options...
HossC Posted February 27, 2013 Report Share Posted February 27, 2013 I won't have a chance to do any more work until the 7th of march when my exams finish.Don't you turn 18 on that day too? Quote Link to comment Share on other sites More sharing options...
CDoherty95 Posted February 27, 2013 Author Report Share Posted February 27, 2013 Don't you turn 18 on that day too? Indeed I do Hoss! No better day to finish exams! Quote Link to comment Share on other sites More sharing options...
CDoherty95 Posted March 8, 2013 Author Report Share Posted March 8, 2013 Finally finished my exams today! As soon as I got in the door I went straight to bed for an hour. Anyway this project is coming together nicely, with only the stars, final clear coat, saddle, brakes and gears to do. This is always my favourite part of the whole build... Making something from scratch to serve a purpose that wouldn't normally need serving on a normal bike. On this bike, because I raised the back end the chain had to run at an angle to make it from the pedals to the wheel. However this caused a whole world of problems, as the chain now rubbed off the frame, damaging the paint and the chain itself. I really had no idea what to do to solve this problem.Then one evening it hit me. Build a hanging bracket that mounts to the frame using the bolts already present. To do this I took apart a set of gears, and cut and drilled into the aluminum bracket designed to hold two cogs which hold the chain. It may seem simple, but I'm personally very pleased with it for some reason.This next picture shows the handlebar stem and seat post painted and reinstalled. You can see how low the back of this bike was originally. In reality, lifting the bike has left the crossbar (where the flag and text ar) just about parallel to the ground.And no the bin isn't reflecting the orange paint, I accidentally got some paint on it...oops!And finally, a picture of the almost fully assembled bike. I'm going to keep my eye out for a disc brake for the back wheel, as I want to be able to lock up the back wheel for skids and slides. As you can see the front wheel is smaller than the back wheel, and that's because the proper sized front wheel didn't have a tire on it at the time of the photo. I've tried to keep this General as close as possible to the second Lee I build, so I copied the graphics by hand, used the same paint, clear coat, leather for the handlebars and saddle, and I even made the handlebar grips the same size (slight OCD showing there).Hopefully I can get the final clear coat on this weekend, and maybe have it fully functional by Sunday evening... Quote Link to comment Share on other sites More sharing options...
CDoherty95 Posted June 17, 2013 Author Report Share Posted June 17, 2013 I've finally managed to get back working on this project earlier today. I literally worked from dawn till dusk, getting two coats of clear coat sprayed on, a hand stitched leather saddle designed and stitched together, brakes and gears working and hanging bracket painted and reinstalled. The only thing I have left to do is to find a replacement right pedal, as the old one was broken and I haven't got any correct ones lying around. For now though here's a couple of new pictures! The two Lee's together. My goal is to make the new Lee as accurate as possible to my other Lee.My "Hazzardous" collection of bikes. Quote Link to comment Share on other sites More sharing options...

Recommended Posts
Join the conversation
You can post now and register later. If you have an account, sign in now to post with your account.
Note: Your post will require moderator approval before it will be visible.